Category Archives: SDN

Exploring Powerstrip from ClusterHQ: A Socketplane Adapter for Docker

icon_512x512ClusterHQ_logopowerstrip@2x

sources: http://socketplane.io, https://github.com/ClusterHQ/powerstrip, http://clusterhq.com

Over the past few months one of the areas worth exploring within the container ecosystem is how it works with external services and applications. I currently work in EMC CTO Advanced Development so naturally my interest level is more about data services, but because my background working with SDN controllers and architectures is still one of my highest interests I figured I would get to know what Powerstrip was by working with Socketplane’s Tech Release.

*Disclaimer:

This is not the official integration for powerstrip with sockeplane merged over the last week or so, I was working on this in a rat hole and it works a little differently than the one that Socketplane merged recently.

What is Powerstrip?

Powerstrip is a simple proxy for docker requests and responses to and from the docker client/daemon that allows you to plugin “adapters” that can ingest a docker request, perform an action, modification, service setup etc, and output a response that is then returned to Docker. There is a good explaination on ClusterHQ’s Github page for the project.

Powerstrip is really a prototype tool for Docker Plugins, and a more formal discussion , issues, and hopefully future implementation of Docker Plugins will come out of such efforts and streamline the development of new plugins and services for the container ecosystem.

Using a plugin or adapter architecture, one could imagine plugging storage services, networking services, metadata services, and much more. This is exactly what is happening, Weave, Flocker both had adapters, as well as Socketplane support recently.

Example Implementation in GOlang

I decided to explore using Golang, because at the time I did not see an implementation of the PowerStripProtocol in Go. What is the PowerStripProtocol?

The Powerstrip protocol is a JSON schema that Powerstrip understands so that it can hook in it’s adapters with Docker. There are a few basic objects within the schema that Powerstrip needs to understand and it varies slightly for PreHook and PostHook requests and responses.

Pre-Hook

The below scheme is what PowerStripProtocolVersion: 1 implements, and it needs to have the pre-hook Type as well as a ClientRequest.

{
    PowerstripProtocolVersion: 1,
    Type: "pre-hook",
    ClientRequest: {
        Method: "POST",
        Request: "/v1.16/container/create",
        Body: "{ ... }" or null
    }
}

Below is what your adapter should respond with, a ModifiedClientRequest

{
    PowerstripProtocolVersion: 1,
    ModifiedClientRequest: {
        Method: "POST",
        Request: "/v1.16/container/create",
        Body: "{ ... }" or null
    }
}

Post-Hook

The below scheme is what PowerStripProtocolVersion: 1 implements, and it needs to have the post-hook Type as well as a ClientRequest and a Server Response. We add ServerResponse here because post hooks are already processed by Docker, therefore they already have a response.

{
    PowerstripProtocolVersion: 1,
    Type: "post-hook",
    ClientRequest: {
        Method: "POST",
        Request: "/v1.16/containers/create",
        Body: "{ ... }"
    }
    ServerResponse: {
        ContentType: "text/plain",
        Body: "{ ... }" response string
                        or null (if it was a GET request),
        Code: 404
    }
}

Below is what your adapter should respond with, a ModifiedServerResponse

{
    PowerstripProtocolVersion: 1,
    ModifiedServerResponse: {
        ContentType: "application/json",
        Body: "{ ... }",
        Code: 200
    }
}

Golang Implementation of the PowerStripProtocol

What this looks like in Golang is the below. (I’ll try and have this open-source soon, but it’s pretty basic :] ). Notice we implement the main PowerStripProtocol in a Go struct, but the JSON tag and options likes contain an omitempty for certain fields, particularly the ServerResponse. This is because we always get a ClientRequest in pre or post hooks but now a ServerResponse.

powerstripprotogo

We can implement these Go structs to create Builders, which may be Generic, or serve a certain purpose like catching pre-hook Container/Create Calls from Docker and setting up socketplane networks, this you will see later. Below are generall function heads that return an Marshaled []byte Go Struct to gorest.ResponseBuilder.Write()

buildprehook

builtposthook

Putting it all together

Powerstrip suggests that adapters be created as Docker containers themselves, so the first step was to create a Dockerfile that built an environment that could run the Go adapter.

Dockerfile Snippets

First, we need a Go environment inside the container, this can be set up like the following. We also need a couple of packages so we include the “go get” lines for these.

pwerstripdockerfilego

Next we need to enable our scipt (ADD’ed earlier in the Dockerfile) to be runnable and use it as an ENTRYPOINT. This script takes commands like run, launch, version, etc

runascript

Our Go-based socketplane adapter is laid out like the below. (Mind the certs directory, this was something extra to get it working with a firewall).

codelayout

“powerstrip/” owns the protocol code, actions are Create.go and Start.go (for pre-hook create and post-hook Start, these get the ClientRequests from:

  • POST /*/containers/create

And

  • POST /*/containers/*/start

“adapter/” is the main adapter that processes the top level request and figures out whether it is a prehook or posthook and what URL it matches, it uses a switch function on Type to do this, then sends it on its way to the correct Action within “action/”

“actions” contains the Start and Create actions that process the two pre hook and post hook calls mentioned above. The create hook does most of the work, and I’ll explain a little further down in the post.

actions

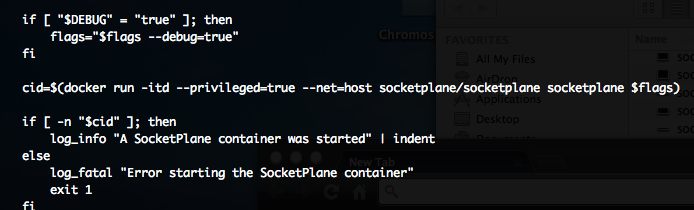
Now we can run “docker buid -t powerstrip-socketplane .” in this directory to build the image. Then we use this image to start the adapter like below. Keep in mind the script is actually using the “unattended nopowerstrip” options for socketplane, since were using our own separate one here.

docker run -d --name powerstrip-socketplane \
 --expose 80 \
 --privileged \ 
 --net=host \
 -e BOOTSTRAP=true \
 -v /var/run/:/var/run/ \
 -v /usr/bin/docker:/usr/bin/docker \
 powerstrip-socketplane launch

Once it is up an running, we can use a simple ping REST URL to test if its up: It should respond “pong” if everything is running.

$curl http://localhost/v1/ping
pong

Now we need to create our YAML file for PowerStrip and start our Powerstrip container.

Screen Shot 2015-02-04 at 4.23.59 PM

Screen Shot 2015-02-04 at 4.24.05 PM

If all is well, you should see a few containers running and look somthing like this

dddd151d4076        socketplane/socketplane:latest   "socketplane --iface   About an hour ago   Up About an hour                             romantic_babbage

6b7a63ce419a        clusterhq/powerstrip:v0.0.1      "twistd -noy powerst   About an hour ago   Up About an hour    0.0.0.0:2375->2375/tcp   powerstrip
d698047800b1        powerstrip-socketplane:latest    "/opt/run.sh launch"   2 hours ago         Up About an hour                             powerstrip-socketplane

The adapter will automatically spawn off a socketplane/socketplane:latest container because it installs socketplane brings up the socketplane software.

Once this is up, we need to update our DOCKER_HOST environment variable and then we are ready to go to start issuing commands to docker and our adapter will catch the requests. Few examples below.

export DOCKER_HOST=tcp://127.0.0.1:2375

Next we create some containers with a SOCKETPLANE_CIDR env vairable, the adapter will automatically catch this and process the networking information for you.

docker create --name powerstrip-test1 -e SOCKETPLANE_CIDR="10.0.6.1/24" ubuntu /bin/sh -c "while true; do echo hello world; sleep 1; done"
docker create --name powerstrip-test2 -e SOCKETPLANE_CIDR="10.0.6.1/24" ubuntu /bin/sh -c "while true; do echo hello world; sleep 1; done”

Next, start the containers.

docker start powerstrip-test1

docker start powerstrip-test2

If you issue an ifconfig on either one of these containers, you will see that it owns an ovs<uuid> port that connects it to the virtual network.

sudo docker exec powerstrip-test2 ifconfig
ovs23b79cb Link encap:Ethernet  HWaddr 02:42:0a:00:06:02

          inet addr:10.0.6.2  Bcast:0.0.0.0  Mask:255.255.255.0

          inet6 addr: fe80::a433:95ff:fe8f:c8d6/64 Scope:Link

          UP BROADCAST RUNNING  MTU:1440  Metric:1

          RX packets:12 errors:0 dropped:0 overruns:0 frame:0

          TX packets:9 errors:0 dropped:0 overruns:0 carrier:0

          collisions:0 txqueuelen:0

          RX bytes:956 (956.0 B)  TX bytes:726 (726.0 B)

We can issue a ping to test connectivity over the newly created VXLAN networks. (powerstrip-test1=10.0.6.2, and powerstrip-test2=10.0.6.3)

$sudo docker exec powerstrip-test2 ping 10.0.6.2

PING 10.0.6.2 (10.0.6.2) 56(84) bytes of data.

64 bytes from 10.0.6.2: icmp_seq=1 ttl=64 time=0.566 ms

64 bytes from 10.0.6.2: icmp_seq=2 ttl=64 time=0.058 ms

64 bytes from 10.0.6.2: icmp_seq=3 ttl=64 time=0.054 ms

So what’s really going on under the covers?

In my implementation of the powerstrip adapater, the adapter does the following things

  • Adapter recognizes a Pre-Hook POST /containers/create call and forwards it to PreHookContainersCreate
  • PreHookContainersCreate checks the client request Body foe the ENV variable SOCKETPLANE_CIDR, if it doesn’t have it it returns like a normal docker request. If it does then it will probe socketplane to see if the network exists or not, if it doesn’t it creates it.
  • In either case, there will be a “network-only-container” created connected to the OVS VXLAN L2 domain, it will then modify the response body in the ModifiedClientRequest so that the NetworkMode gets changed to –net:container:<new-network-only-container>.
  • Then upon start the network is up and the container boots likes normal with the correct network namespace connected to the socketplane network.

Here is a brief architecture to how it works.

diag

Thanks for reading, please comment or email me with any questions.

Cheers!

Docker Virtual Networking with Socketplane.io

Screen Shot 2015-01-16 at 11.03.27 AM

Screen Shot 2015-01-16 at 11.04.21 AMScreen Shot 2015-01-16 at 11.03.50 AM

Screen Shot 2015-01-16 at 11.06.36 AM

ImgCred: http://openvswitch.org/, http://socketplane.io/, https://consul.io/, https://docker.com/

Containers have no doubt been a hyped technology in 2014 and now moving into 2015. Containers have been around for a while now (See my other post on a high-level overview of the timeline) and will be a major technology to think about for the developer as well as within the datacenter moving forward.

Today I want to take the time to go over Socketplane.io’s first preview of the technology they have been working on and since announcing their company in mid-october. Socketplane.io is “driving DevOps Defined Networking by enabling distributed security, application services and orchestration for Docker and Linux containers.” and is backed by some great tech talent, Brent Salisbury, Dave Tucker, Madhu Venugopal, John M. Willis who all bring leading edge network and ops skills into one great effort which is socketplane.io. I have had the pleasure to meet up with Brent and Madhu at ONS last year and have done some work with Brent way back when I was working on Floodlight, and am very excited for the future of Socketplane.io.

What’s behind Socketplane.io and What is the current preview technology?

The current tech preview released on github allows you to get a taste of multi-host networking between Dockerhosts using Open vSwitch and Consul as core enablers by building VXLAN tunnels between hosts to connect docker containers on the same virtual(logical) network with no remote/external SDN controller needed. The flows are programmed via OVSDB into the software switch so the user experience and maintenance is smooth with the least amount of moving parts. Users will interact with a wrapper CLI called “socketplane” for docker that also controls how socketplane’s virtual networks are created, deleted and manipulated. Socketplane’s preview uses this wrapper but if your following Docker’s plugin trend then you know they hope to provide virtual network services this way in the future (keep posted on this). I’d also love to see this tech be portable to other container technologies such as LXD or Rocket in the future. Enough text, lets get into the use of Socketplane.io

Walkthrough

First lets look at the components of what we will be setting up in this post. Below you will see 2 nodes: socketplane node1 and socketplane node2, we will be setting up these using Vagrant and Virtualbox using Socketplane’s included Vagrantfile. In these two nodes, when socketplane starts up we it will install OVS and Docker and start a socketplane container that runs Consul for managing network state. (one socketplane container will be the master, I’ll show more on this later as well). Then we can create networks, create containers and play with some applications. I will cover this in detail as well as show how the hosts are connected via VXLAN and demo a sample web application across hosts.

socketplane-arch

Setup Socketplane.io’s preview.

First install Virtualbox and Vagrant (I dont cover this, but use the links), then lets Checkout the repo

socketplanedemo1

Set an environment variable named SOCKETPLANE_NODES that tells the installation file how many nodes to setup on your local environment. I chose 3. Then run “vagrant up” in the source directory.

socketplanedemo2

After a few or ten minutes you should be all set to test out socketplane thanks to the easy vagrant setup provided by the socketplane guys. (There are also manual install instructions on their github page if you fancy setting this on on bare-metal or something) You should see 3 nodes in virtualbox after this. Or you can run “vagrant status”

socketplanedemo15

Now we can SSH into one of our socketplane nodes. Lets SSH into node1.

socketplamedemo3

Now you SSHed into one of the socketplane nodes. We can issues a “sudo socketplane” command and see the available options the CLI tool gives us.

socketplanedemo5

socketplanedemo4

Some of the commands that are used to run. start, stop, remove etc containers are used via “socketplanerun | start | stop | rm | attach” and these are used just like “docker run | start | stop | rm | attach”

Socketplane sets up a “default” network that (for me) has a 10.1.0.0/16 subnet address and if you run “socketplane network list” you should see this network. To see how we can create virtual networks (vnets) we can issue a command pictures below “socketplane network create foo4 10.6.0.0/16”

Screen Shot 2015-01-16 at 1.27.10 PM

This will create a vnet named foo4 along with a vlan for vxlan and default gateway at the .1 address. Now we can see both our default network and our “foo4” network in the list command.

Screen Shot 2015-01-16 at 1.55.26 PM

If we look at our Open vSwitch configuration now using the “ovs-vsctl show” command we will also see a new port named foo4 that acts as our gateway so we can talk to the rest of the nodes on this virtual network. You should also see the vxlan endpoints that aligns with your eth1 interfaces on the sockeplane node.

Screen Shot 2015-01-16 at 2.07.18 PMGreat, now we are all set up so run some containers that connect over the virtual network we just created. So on socketplane-1 issue a “sudo socketplane run -n foo4 -it ubuntu:14.10 /bin/bash”, this will start a ubuntu container on socketplane-1 and connect it to the foo4 network.

Screen Shot 2015-01-16 at 2.12.09 PM

You can Ctrl-Q + Ctrl-P to exit the container and leave the tty open. If you issue a ovs-vsctl show command again you will see a ovs<uuid> port added to the docker0-ovs bridge. This connects the container to the bridge allowing it to communicate over the vnet. Lets create another container, but this time on our socketplane-2 host. So exit out and ssh into socketplane-2 and issue the same command. We should then be able to ping between our two containers on different hosts using ths same vnet.

Screen Shot 2015-01-16 at 2.18.18 PM

Awsome, we can ping out first container from our second without having to setup any network information on the second host. This is because the network state it propagated across the cluster so when we reference “foo4” on any of the nodes it will use the same network information. If you Ctrl-Q + Ctrl-P while running ping, we can also see the flows that are in our switch. We just need to use appctl and reference our docker0-ovs integration bridge.

Screen Shot 2015-01-16 at 2.22.05 PM

As we can see our flows indicate the VXLAN flows thatheader and forward it to the destination vxlan endpoint and pop (action:pop_vlan) the vlan off the encap in ingress to our containers.

To show a more useful example we can start a simple web application on socketplane-2 and access it over our vnet on socketplane-1 without having to use the Dockerhost IP or NAT. See blow.

First start an image named tutum/hello-world and add it to the foo4 network and expose port 80 at runtime and give it a name “Web”. Use the “web” name with the socketplane info command to get the IP Address.

Screen Shot 2015-01-16 at 2.28.10 PM

Next, logout and SSH to socketplane-1 and run an image called tutm/curl (simple curl tool) and run a curl <IP-Address> and you should get back a response from the simple “Web” container we just setup.

Screen Shot 2015-01-16 at 2.31.20 PM

This is great! No more accessing pages based on host addresses and NAT. Although a simple use-case, this shows some of the benefit of running a virtual network across many docker hosts.

A little extra

So i mentioned before that socketplane runs Consul in a separate container, you can see the logs of consul by issuing “sudo socketplane agent logs” on any node. But for some more fun and to poke around at some things we are going to use nsenter. First find the socketplane docker container, then follow the commands to get into the socketplane container.

Screen Shot 2015-01-16 at 2.41.32 PM

Now your in the socketplane container, we can issue an ip link see that socketplane uses HOST networking to attach consul and get consul running on the host network so the Consul cluster can communicate. We can confirm this by looking at the script used to start the service container.Screen Shot 2015-01-16 at 2.41.49 PM

See line:5 of this snippet, docker runs socketplane with host networking.

socketplane in container with host networking

You can issue this command on the socketplane-* hosts or in the socketplane container and you should receive a response back from Consul showing you that is listening on 8500.

Screen Shot 2015-01-16 at 2.42.40 PM

You can issue “consul members” on the socketplane hosts to see the cluster as well.

Screen Shot 2015-01-16 at 2.46.08 PM

You can also play around with consul via the python-consul library to see information stored in Consul.

Screen Shot 2015-01-16 at 2.53.38 PM

Conclusion

Overall this a great upgrade to the docker ecosystem, we have seen other software products like Weave, Flannel, Flocker and others i’m probably missing address a clustered Docker setup with some type of networking overlay or communications proxy to connect multi-hosted containers. Socketplane’s preview is completely opensource and is developed on github, if your interested in walking through the code, working on bugs or possibly suggesting or adding features visit the git page. Overall I like the OVS integration a lot mainly because I am a proponent of the software switch and pushing intelligence to the edge. I’d love to see some optional DPDK integration for performance in the near future as well as more features that enable fire-walling between vnets and others. I’m sure its probably on the horizon and am eagerly looking forward to see what Socketplane.io has for containers in the future.

cheers!

Nicira (VMWare) NVP/NSX: A Python API and Toolkit

Python

Python Programming Language

vmware NSX by Nicira.

Over the past few years working at EMC we regularly use NVP/NSX in some of our lab environments and throughout the years this means that we have needed to upgrade, manipulate and overhaul our network architecture with NVP/NSX every so often. We have been using a Python library developed internally by myself and Patrick Mullaney with some help from Erik Smith in the early days, and I wanted to share some of its tooling.

(need to drop this in here)

*Disclaimer : By no means does EMC make any representation or take any obligation with regard to the use of this library, NVP or NSX in any way shape or form. This post is the thoughts of the author and the author alone. The examples and API calls have mainly been testing against NVP up to 3.2 before it became NSX. However, most calls should work against the NSX API except for any net-new api endpoints that have not been added. Another note is that this API is not fully featured, it is merely a tool that we use in the lab for what we need, it can be extended, expanded however you like.(update 4/14/15′ See Open-source section toward the bottom for more information ) I’ll be working on opensource this library and try and fill in some of the missing features as I go along. There are two main uses for this python library:

1. Manage NVP/NSX Infrastructure

Managing, automating, and orchestrating the setup of NVP/NSX components was a must for us. We wanted to be able to spin up and down environments on the flow, and or manage upgrading new components when we wanted to upgrade.

The Library allows you to remotely setup Hypervisor Nodes, Gateway Nodes, Service Nodes etc. (Examples Below)

2. Python bindings to NVP/NSX REST API

 Having python bindings for some of the investigative projects we have been working on was out first motivation. A) because we developed and were familiar with Python, B) We have been working with OpenStack and it just made sense.

With the library you can list networking, attach ports, query nodes etc. (Examples are given in the test.py example below.)


Manage NVP/NSX Infrastructure Let me preface this by saying this isn’t a complete M&O / DevOps / Baremetal Provisioning service for NVP or NSX components, it does however manage setting up much of the logical state components with as little hands-on cli commands as possible,  like setting up OVS certificates, creating integrations bridges and contacting the Control Cluster to register the node as a Hypervisor Node, Service Node etc. Openvswitch is the only thing that does need to be installed, and any other nicira debs that come with their software switch/ hypervisor node offering. You just need to install the debs and then let the configuration tool take over.  (I am running this on Ubuntu 14.04 in this demo)

sudo dpkg --purge openvswitch-pki 
sudo dpkg -i openvswitch-datapath-dkms_1.11.0*.deb 
sudo dpkg -i openvswitch-common_1.11.0*.deb openvswitch-switch_1.11.0*.deb 
sudo dpkg -i nicira-ovs-hypervisor-node_1.11.0*.deb

Once OVS is installed on the nodes that you will be adding to your NVP/NSX architecture you can use the library and cli tools to setup, connect, and register the virtual network components. The way this is done is by describing the infrastructure components in JSON form from a single control host, or even a NVP/NSX linux host. We thought about using YAML here, but after everything we chose JSON. Sorry if you a YAML fan. The first thing needed by the tooling is some basic control cluster information. The IP of the controller, the username and password along with the port to use for authentication. (sorry for the ugly blacked out IPs) ss2-1 Next, you can describe different types of nodes for setup and configuration. These nodes can be:

SERVICE, GATEWAY, or COMPUTE

The difference with the SERVICE or GATEWAY node is that it will have a:

"mgmt_rendezvous_server" : true|false 
"mgmt_rendezvous_client" : true|false

respectively instead of a “data network interface. Service or Gateway nodes need this metadata in it’s configuration JSON to be created correctly. I dont have examples of using this (Sorry) and am focusing on using this for Hypervisor Nodes, since this is what we find we are creating/reconfiguring most. Here is an example of such a config. ss5 Once this configuration is complete, you can now reference the “name” of the compute node, and it will provision the COMPUTE node to the NVP/NSX system/cluster. If the hypervisor node is remote the toolkit will use remote sudo SSH, so you will need to enter a user/pass when you get prompted. ss3 Screen Shot 2014-10-10 at 2.17.05 PM As you can see, the command runs through all the process needed to setup the node, and at the end of it, you should have a working hypervisor node ready to go. (Scroll down, you can verify it’s setup by looking at the UI) Here is what it looks like when you do it remotely. loginpass You’ll then see similar output to the below, running through the sequence of setting up the hypervisor node remotely, keys, OVS calls, and contacting the NVP/NSX cluster to register the node using the PKI.

Sending… rm -f /etc/openvswitch/vswitchd.cacert
Sending… mkdir -p /etc/openvswitch
Sending… ovs-pki init –force
Sending… ovs-pki req+sign ovsclient controller –force
Sending… ovs-vsctl — –bootstrap set-ssl /etc/openvswitch/ovsclient-privkey.pem /etc/openvswitch/ovsclient-cert.pem /etc/openvswitch/vswitchd.cacert
Sending… cat /etc/openvswitch/ovsclient-cert.pem
printing status
0
[sudo] password for labadmin:
Certificate:
    Data:
        Version: 1 (0x0)
        Serial Number: 12 (0xc)
    Signature Algorithm: md5WithRSAEncryption
        Issuer: C=US, ST=CA, O=Open vSwitch, OU=controllerca, CN=OVS controllerca CA Certificate (2014 Oct 10 10:56:26)
        Validity
            Not Before: Oct 10 18:15:57 2014 GMT
            Not After : Oct  7 18:15:57 2024 GMT
        Subject: C=US, ST=CA, O=Open vSwitch, OU=Open vSwitch certifier, CN=ovsclient id:4caa4f75-f7b5-4c23-8275-9e2aa5b43221
        Subject Public Key Info:
            Public Key Algorithm: rsaEncryption
                Public-Key: (2048 bit)
                Modulus:
                    00:c2:b9:7d:9f:1d:00:78:4b:c0:0d:8a:52:d5:61:
12:02:d3:01:7d:ea:f6:22:d4:7d:af:6f:c1:91:40:
                    7f:e1:a1:a1:3d:2d:3f:38:f6:37:f6:83:85:3c:62:
                    b4:cc:60:40:d9:d3:61:8d:26:96:94:47:57:2d:fa:
                    53:ce:48:84:4c:a2:01:84:d8:11:61:de:50:f9:b5:
                    ff:9c:4b:6e:9c:df:84:48:f1:44:ec:e0:fd:e4:a1:
                    b6:0b:5c:23:59:5c:1d:cf:46:44:19:14:1c:92:a1:
                    28:52:19:ab:b8:5e:23:17:7a:b8:51:af:bc:48:1c:
                    d2:d8:58:67:61:a3:e6:51:f5:a0:57:a9:16:36:e8:
16:35:f6:20:3c:51:f8:4c:82:51:74:8b:48:90:e4:
                    dc:7a:44:f2:2b:d7:68:81:f6:9e:df:15:14:80:27:
                    77:e1:24:36:ac:fd:79:c2:03:64:1a:c0:4a:5b:b7:
                    dd:d3:fb:ca:20:13:f7:09:9e:03:f8:b0:fe:14:e7:
                    c9:7e:aa:1d:79:c3:c1:c2:a6:c3:68:cf:ff:ec:a4:
                    9a:5f:d4:f4:df:c2:e6:1d:a2:63:68:f2:d1:1d:00:
                    19:18:18:93:72:37:9e:b9:a4:2b:23:fd:83:ab:40:
                    52:0d:2e:9c:08:82:50:c0:1b:ec:e9:40:fc:1d:74:
                    1d:f3
                Exponent: 65537 (0x10001)
    Signature Algorithm: md5WithRSAEncryption
         85:fe:4b:97:77:ce:82:32:67:fc:74:12:1e:d4:a5:80:a3:71:
         a5:be:31:6c:be:89:71:fb:18:9f:5f:37:eb:e7:86:b8:8d:2e:
         0c:d7:3d:42:4e:14:2c:63:4e:9b:47:7e:ca:34:8d:8e:95:e8:
         6c:35:b4:7c:fc:fe:32:5b:8c:49:64:78:ee:14:07:ba:6d:ea:
         60:e4:90:e5:c0:29:c2:bb:52:38:2e:b5:38:c0:05:c2:a2:c9:
         8b:d0:08:27:57:ec:aa:14:51:e2:a1:16:f6:cf:25:54:1f:64:
         c8:37:f0:31:22:c9:cb:9d:a1:5a:76:b8:3e:77:95:19:5e:de:
         78:ce:56:0d:60:0a:b2:e6:b8:f5:3a:30:63:68:24:27:e2:95:
         dc:09:9e:30:ff:ea:51:14:9c:55:bd:31:3c:0c:a2:26:8e:71:
         fc:ec:85:56:a7:9c:e0:27:1b:ad:d4:e8:35:f7:da:ee:2a:55:
         90:9b:bd:d1:db:b9:b8:f9:3a:f6:95:94:c2:34:32:ea:27:3f:
         f8:46:c0:40:c2:0c:32:45:0d:82:14:c2:f6:a8:3e:28:33:9b:
         64:79:c0:2e:06:7a:1b:a3:56:9e:16:70:a0:3c:57:95:cf:e1:
         b2:7f:97:42:c9:82:f0:3c:1e:77:07:86:60:c8:00:a6:c8:96:
         94:26:94:e3
—–BEGIN CERTIFICATE—–
MIIDjTCCAnUCAQwwDQYJKoZIhvcNAQEEBQAwgYkxCzAJBgNVBAYTAlVTMQswCQYD
VQQIEwJDQTEVMBMGA1UEChMMT3BlbiB2U3dpdGNoMRUwEwYDVQQLEwxjb250cm9s
bGVyY2ExPzA9BgNVBAMTNk9WUyBjb250cm9sbGVyY2EgQ0EgQ2VydGlmaWNhdGUg
KDIwMTQgT2N0IDEwIDEwOjU2OjI2KTAeFw0xNDEwMTAxODE1NTdaFw0yNDEwMDcx
ODE1NTdaMIGOMQswCQYDVQQGEwJVUzELMAkGA1UECBMCQ0ExFTATBgNVBAoTDE9w
ZW4gdlN3aXRjaDEfMB0GA1UECxMWT3BlbiB2U3dpdGNoIGNlcnRpZmllcjE6MDgG
A1UEAxMxb3ZzY2xpZW50IGlkOjRjYWE0Zjc1LWY3YjUtNGMyMy04Mjc1LTllMmFh
NWI0MzIyMTCCASIwDQYJKoZIhvcNAQEBBQADggEPADCCAQoCggEBAMK5fZ8dAHhL
wA2KUtVhEgLTAX3q9iLUfa9vwZFAf+GhoT0tPzj2N/aDhTxitMxgQNnTYY0mlpRH
Vy36U85IhEyiAYTYEWHeUPm1/5xLbpzfhEjxROzg/eShtgtcI1lcHc9GRBkUHJKh
KFIZq7heIxd6uFGvvEgc0thYZ2Gj5lH1oFepFjboFjX2IDxR+EyCUXSLSJDk3HpE
8ivXaIH2nt8VFIAnd+EkNqz9ecIDZBrASlu33dP7yiAT9wmeA/iw/hTnyX6qHXnD
wcKmw2jP/+ykml/U9N/C5h2iY2jy0R0AGRgYk3I3nrmkKyP9g6tAUg0unAiCUMAb
7OlA/B10HfMCAwEAATANBgkqhkiG9w0BAQQFAAOCAQEAhf5Ll3fOgjJn/HQSHtSl
gKNxpb4xbL6JcfsYn1836+eGuI0uDNc9Qk4ULGNOm0d+yjSNjpXobDW0fPz+MluM
SWR47hQHum3qYOSQ5cApwrtSOC61OMAFwqLJi9AIJ1fsqhRR4qEW9s8lVB9kyDfw
MSLJy52hWna4PneVGV7eeM5WDWAKsua49TowY2gkJ+KV3AmeMP/qURScVb0xPAyi
Jo5x/OyFVqec4CcbrdToNffa7ipVkJu90du5uPk69pWUwjQy6ic/+EbAQMIMMkUN
ghTC9qg+KDObZHnALgZ6G6NWnhZwoDxXlc/hsn+XQsmC8DwedweGYMgApsiWlCaU
4w==
—–END CERTIFICATE—–
Sending… ovs-vsctl set-manager ssl:10.*.*.*
Sending… ovs-vsctl br-set-external-id br-int bridge-id br-int
Sending… ovs-vsctl — –may-exist add-br br-int
Sending… ovs-vsctl — –may-exist add-br br-eth1
Sending… ovs-vsctl — –may-exist  add-port br-eth1 eth1

After setup you can verify that the node is setup by logging into it if your remote, and running the ovs-vsctl show command. This will show you all configuration that has been done to setup the hypervisor node. Managers and Controllers are setup and connected, and bridge interfaces created and ready to connect tunnels. Screen Shot 2014-10-10 at 2.17.16 PM We can also verify that the Hypervisor node is setup correctly by looking at the NSX/NVP Manager Dashboard. This shows that the Ubuntu Node is now connected, using the correct Transport Zone, and is up and ready to go. Screen Shot 2014-10-10 at 2.17.29 PM Thats the end of what I wanted to show as far as remote configuration of NVP/NSX components goes. We use this a lot when setting up our OpenStack environments and when we add or remove new Compute nodes that need to talk on the Neutron/Virtual Network. Again there are some tweaks and cleanups I need to address, but hopefully I can have this available on a public repo soon.

Python bindings to NVP/NSX REST API

Now I want to get into using the toolkit’s NVP/NSX Python API. This is a API written in python that addresses the REST API’s exposed from NVP/NSX. The main class of the API takes Service Libraries as arguments, and them calls the init method on them to instantiate their provided functions. For instance “ControlSevices” focuses on control cluster API calls rather than the logical virtual network components.

from nvp2 import NVPClient
from transport import Transport
from network_services import NetworkServices
from control_services import ControlServices
import logging

class NVPApi(Transport, NetworkServices, ControlServices)
    client = NVPClient()
    log = logging
    def __init__(self, debug=False, verbose=False):
        self.client.login()
        if verbose:
          self.log.basicConfig(level=self.log.INFO)
        if debug:
          self.log.basicConfig(level=self.log.DEBUG)
        Transport.__init__(self, self.client, self.log)
        NetworkServices.__init__(self, self.client, self.log)
        ControlServices.__init__(self, self.client, self.log)

Some example of how to instantiate the library class and use the provided service functions for NVP/NSX are below. This is not a full featured list, and more than less they are for NVP 3.2 and below. We are in the process of making sure it works across the board, so far NVP/NSX APIs have been pretty good at being backward compatible.

from api.nvp_api import NVPApi
#Instantiate an  API Object
#api = NVPApi()
api = NVPApi(debug=True)
#api = NVPApi(debug=True, verbose=True)
#print "Available Functions of the API"
# print dir(api)
# See an existing "Hypervisor Node"
print api.tnode_exists("My_Hypervisor_Node")
# Check for existing Transport Zones
print api.get_transport_zones()
# Check for existing Transport Zone
print api.check_transport_exists("My_Transport_Zone")
# Check Control Cluster Nodes
nodes = api.get_control_cluster()
for node in nodes:
print "\n"
  print node['display_name']
  for role in node['roles']:
     print "%s" % role['role']
     print "%s\n" % role['listen_addr']
print "\n"
# Check stats for interfaces on transport node
stats = api.get_interface_statistics("80d9cb27-432c-43dc-9a6b-15d4c45005ee",
   "breth2+")
print "Interface %s" % ("breth2")
for stat, val in stats.iteritems():
  print "%s -- %s" % (stat, val)
print "\n"

I hope you enjoyed reading through some of this, it’s really gone from a bunch of scripts no one can understand to something halfway useful. There are definitely better ways to do this, and by no means is this a great solution, it just one we had lying around that I still use from time to time. Managing the JSON state/descriptions about the nodes was the hardest part when multiple people start using this. We wound up managing the files with Puppet and also using Puppet for installing base openvswitch software for new NVP/NSX components on Ubuntu servers. Happy Friday, Happy Coding, Happy Halloween!

(Update): Open-source

I wanted to update the post with information about the library and how to access it. The great folks at EMC Code ( http://emccode.github.io/ ) have added this project to the #DevHigh5 Program and it is available on their site. Look at the right side and lick the DevHigh5 tag, and look for Nicira NVP/NSX Python under the projects.

Screen Shot 2015-04-14 at 9.21.44 PM

Information can be seen by hovering over the project.

Screen Shot 2015-04-14 at 9.22.03 PM

The code can be viewed on Github and on pypi and can be installed via pip install nvpnsxapi

Screen Shot 2015-04-14 at 9.44.59 PM

https://pypi.python.org/pypi/nvpnsxapi  Screen Shot 2015-04-14 at 9.54.46 PM

Enjoy 🙂

Ganglia Monitoring + Floodlight : “an adaptation into SDN”

It’s been about 2 months since my last post, so let me fill you in on something I’ve been slowly working on.

While doing research in my last semester as an undergrad at Marist College and working for EMC as an SE Intern I came up with what i thought would be a pretty neat idea. The idea started with the fact that I had been working with Ganglia Monitoring System and then I came across a gentlemen names Brian Bockelman from Nebraska. I had a brief conversation about gridFTP with him, how it would be nice to monitor the hosts running gridFTP and be able to react to load on the network using the network controller. Thus, where host-aware networking came from.

“Ganglia is a scalable distributed monitoring system for high-performance computing systems such as clusters and Grids. It is based on a hierarchical design targeted at federations of clusters. It leverages widely used technologies such as XML for data representation, XDR for compact, portable data transport, and RRDtool for data storage and visualization. It uses carefully engineered data structures and algorithms to achieve very low per-node overheads and high concurrency. The implementation is robust, has been ported to an extensive set of operating systems and processor architectures, and is currently in use on thousands of clusters around the world. It has been used to link clusters across university campuses and around the world and can scale to handle clusters with 2000 nodes.”

Because ganglia uses RRD (Round Robin Database) files to store time sensitive information about a specific host, using this, each host can store information about their network load, cpu usage, memory that is free, etc. What I wanted to do was mux the SDN environment with the scale-out Ganglia Monitored network so I could make network decisions based on data I was getting back from the monitored hosts.

I wanted to accomplish a few simple tasks,

  1. The controller of the network should be “aware” of which hosts are monitored by Ganglia
  2. The controller should be able to “poll” the data from the hosts it knows are being monitored.
  3. The data should relate to “thresholds” set by a network admin, so when a threshold is met, the network reacts via the controller.

Off the bat I needed a controller, I’ve used Floodlight before and it has a great open community for developing opensource, so I pulled the master off git and threw it in my development environment. My development environment consisted of 2 x86 boxes that ran KVM and Openvswitch. (this could certainly work for monitoring compute nodes within an openstack environment, or even guests within a specific tenant). Openvswitch provides my openflow connections to Floodlight as well as the data flows between virtual interfaces on KVM. Here is a diagram that should visual the dev environment.

Dev Environment

ovs-ganglia-kvm-env

This environment is pretty simple, but does the trick. I ran the Floodlight Controller inside the KVM hypervisor on one host and just Ubuntu VMs for the rest. Download or use apt-get to install ganglia.

On nodes I wanted the monitor on I ran

  • sudo apt-get install ganglia-monitor

On nodes I wanted the monitor and the gmetad collector on, I ran

  • sudo apt-get install ganglia-monitor gmetad

Then for the controller node,

  • sudo apt-get install ganglia-monitor gmetad ganglia-webfrontend

Take note that the node in which Floodlight sits on, also has the gmetad server on it. This is because ganglia metrics from the different cluster are collected in /var/lib/ganglia/rrds/ and the Ganglia Modules will look for this directory. This setting is also configurable incase you set Ganglia to collect them somewhere else. The gmetad server can also export its directory via NFS and can mount on the controller node if you didn’t want to run gmetad on the Floodlight host. I want to eventually have the controller connect to a rrd socket but I thought this was unnecessary for a PoC.

I configured the gmonds to speak UDP to limit network traffic, but ultimately you can use Multicast or UDP, the Ganglia setup really doesn’t matter too much, only that a gmetad directory be located where the controller resides.

Implementation

Once the environment was setup I could start to dive into development but there were a few major design choices I had to consider before I stated to do so.

1) How would I read RRD files from the underlying filesystem? Meaning what interfaces were out there, should I make my own, what RRD functions do I need?

2) What methods was I going to take to consistently poll the data?Are there priorities?, variable polling times? Timing?

My design decisions led me to these conclusions.

1) Thre are a few java interfaces rrd4j, jrobin, java-rrd-hg, and jrrd. Ultimately, I needed to be able to read RRD files with filters like average, max, min in mind. jrrd was the right fit, I wind up using the interface and extending its methods into more useful ones in the module, but it was the choice that works best at the time. It has a few dependencies

net.sourceforge.jrrd:jrrd:jar:0.4-SNAPSHOT

  • commons-logging:commons-logging:jar:1.1.1 (compile)

  • junit:junit:jar:4.5 (test)

I had thought about running cron jobs to dump the RRD files to XML ever so often and read it via streaming or DOM based XML interfaces with java. This wind up getting thrown out the windows for a few different reasons.

2) I decides to represents “Monitored Hosts” and “Ganglia Rules” as objects within the modules, this abstraction allows me to associate rules with hosts, rules can also provide a “pollingTime” variable which tells the controller how often to poll the host for rule thresholds. Once a threshold is met, the “Action” is then carried out, which could be to push  static flow, add a firewall rule, drop traffic etc. Essentially anything the controller can do. Priorities and timing were a must for rules as well.

Metrics that can be monitored by default are:

boottime System boot timestamp l,f
bread_sec
bwrite_sec
bytes_in Number of bytes in per second l,f
bytes_out Number of bytes out per second l,f
cpu_aidle Percent of time since boot idle CPU l
cpu_arm
cpu_avm
cpu_idle Percent CPU idle l,f
cpu_intr
cpu_nice Percent CPU nice l,f
cpu_num Number of CPUs l,f
cpu_rm
cpu_speed Speed in MHz of CPU l,f
cpu_ssys
cpu_system Percent CPU system l,f
cpu_user Percent CPU user l,f
cpu_vm
cpu_wait
cpu_wio
disk_free Total free disk space l,f
disk_total Total available disk space l,f
load_fifteen Fifteen minute load average l,f
load_five Five minute load average l,f
load_one One minute load average l,f
location GPS coordinates for host e
lread_sec
lwrite_sec
machine_type
mem_buffers Amount of buffered memory l,f
mem_cached Amount of cached memory l,f
mem_free Amount of available memory l,f
mem_shared Amount of shared memory l,f
mem_total Amount of available memory l,f
mtu Network maximum transmission unit l,f
os_name Operating system name l,f
os_release Operating system release (version) l,f
part_max_used Maximum percent used for all partitions l,f
phread_sec
phwrite_sec
pkts_in Packets in per second l,f
pkts_out Packets out per second l,f
proc_run Total number of running processes l,f
proc_total Total number of processes l,f
rcache
swap_free Amount of available swap memory l,f
swap_total Total amount of swap memory l,f
sys_clock Current time on host l,f
wcache
(And any added by you/your environment, this is a development effort to add it do rrd)
 

The workflow is essentially this:

  1. Enable Host-Aware Networking
  2. Add the hosts you want to become monitored using the REST interface. The parameters needed with be IP, DOMAIN and Hostname
  3. Add a Rule that defines metrics to be monitored, a threshold for those metrics and associate it with a Host that is actively monitored. Rules can also be “met” a certain amount of time before the controller action is carried out.
  4. You can then view the reactions to the metrics being polls at /hand/gangliahosts/messages (this is not final URI) but this will show INFO, WARN, THRESHOLD_MET, messaged for your hosts and what the controller did.

An example of how this would work is the following:

firewall-example

In the end I tried to code this project with a 2 month time frame, It is mostly done and still in test, but hopefully I can get it out the community to share some of the need things I was able to do by monitoring hosts within a Floodlight controller and reacting to metrics read by the controller.

Cheers!

QoS Managment using BigSwitch Floodlight: Code Release and Video

Hi everyone,

I wanted to share an update on some of the work I’ve been doing around QoS and the BigSwitch Floodlight Controller.

(read below for more information about this application)

I released a video here: (Also available below)

You can also find out more about the project on the floodlight mailing list here:

https://groups.google.com/a/openflowhub.org/forum/?fromgroups=#!topic/floodlight-dev/nBCpAZDdmnc

A direct git link is available here:

https://github.com/wallnerryan/floodlight-qos-beta.git

Enjoy,

R

Quality of Service using BigSwitch’s Floodlight Controller

So I wanted to tackle something traditional networks can do, but using Openflow and SDN. I came to conclusion that the opensource controller made by BigSwitch “Floodlight” fit just the ticket. Before I deep dive into some of the progress I’ve made in this area I wanted to make sure the audience is aware of a few outstanding issues regarding OpenFlow and QoS.

QoS Refernces:

  • OpenFlow (1.0) supports setting the network type of service bits and enqueuing packets. This does not however mean that every switch will support these actions.
  • Queuing Methods:
    Some Openflow implementation to NOT support queuing structures to attach to a specific ports, in turn then “enqueue:port:queue” action in Openflow 1.0 is optional. Therefore resulting in failure on some switches

So, now that some of the background is out of the way, my ultimate goal was so be able to change the PHB’s of flows within the network. I chose to use an OpenStack like example, assuming that QoS will be applied to “fabric” of OVS switches that support Queuing.  The below example will show you how Floodlight can be used to push basic QoS state into the network.

  • OVS 1.4.3 , Use of ovs,vsctl to set up queues.

Parts of the application:

QoS Module:

  • Allows the QoS service and policies to be managed on the controller and applied to the network

QoSPusher & QoSPath


  • Python application used to manage QoS from the command line
  • QoSPath is a python application that utilizes cirtcuitpusher.py to push QoS state along a specific circuit in a network.

Example

Network

Mininet Topo Used
sudo mn –topo linear,4 –switch ovsk –controller=remote,ip= –ipbase=10.0.0.0/8

Enable QoS on the controller:

Visit the tools seciton and click on Quality of Service

Validate that QoS has been enabled.

From the topology above, we want to Rate-Limit traffic from Host 10.0.0.1 to only 2Mbps. The links suggest we need to place 2 flows, one in switch 00:00:00:00:00:00:01 and another in 00:00:00:00:00:00:02 that enqueue the packets that match Host 1 to the rate-limted queue.

./qospusher.py add policy ‘ {“name”: “Enqueue 2:2 s1”, “protocol”:”6″,”eth-type”: “0x0800”, “ingress-port”: “1”,”ip-src”:”10.0.0.1″, “sw”: “00:00:00:00:00:00:00:01″,”queue”:”2″,”enqueue-port”:”2″}’ 127.0.0.1
QoSHTTPHelper
Trying to connect to 127.0.0.1…
Trying server…
Connected to: 127.0.0.1:8080
Connection Succesful
Trying to add policy {“name”: “Enqueue 2:2 s1”, “protocol”:”6″,”eth-type”: “0x0800”, “ingress-port”: “1”,”ip-src”:”10.0.0.1″, “sw”: “00:00:00:00:00:00:00:01″,”queue”:”2″,”enqueue-port”:”2″}
[CONTROLLER]: {“status” : “Trying to Policy: Enqueue 2:2 s1”}
Writing policy to qos.state.json
{
“services”: [],
“policies”: [
” {\”name\”: \”Enqueue 2:2 s1\”, \”protocol\”:\”6\”,\”eth-type\”: \”0x0800\”, \”ingress-port\”: \”1\”,\”ip-src\”:\”10.0.0.1\”, \”sw\”: \”00:00:00:00:00:00:00:01\”,\”queue\”:\”2\”,\”enqueue-port\”:\”2\”}”
]
}
Closed connection successfully

./qospusher.py add policy ‘ {“name”: “Enqueue 1:2 s2”, “protocol”:”6″,”eth-type”: “0x0800”, “ingress-port”: “1”,”ip-src”:”10.0.0.1″, “sw”: “00:00:00:00:00:00:00:02″,”queue”:”2″,”enqueue-port”:”1″}’ 127.0.0.1
QoSHTTPHelper
Trying to connect to 127.0.0.1…
Trying server…
Connected to: 127.0.0.1:8080
Connection Succesful
Trying to add policy {“name”: “Enqueue 1:2 s2”, “protocol”:”6″,”eth-type”: “0x0800”, “ingress-port”: “1”,”ip-src”:”10.0.0.1″, “sw”: “00:00:00:00:00:00:00:02″,”queue”:”2″,”enqueue-port”:”1″}
[CONTROLLER]: {“status” : “Trying to Policy: Enqueue 1:2 s2”}
Writing policy to qos.state.json
{
“services”: [],
“policies”: [
” {\”name\”: \”Enqueue 2:2 s1\”, \”protocol\”:\”6\”,\”eth-type\”: \”0x0800\”, \”ingress-port\”: \”1\”,\”ip-src\”:\”10.0.0.1\”, \”sw\”: \”00:00:00:00:00:00:00:01\”,\”queue\”:\”2\”,\”enqueue-port\”:\”2\”}”,
” {\”name\”: \”Enqueue 1:2 s2\”, \”protocol\”:\”6\”,\”eth-type\”: \”0x0800\”, \”ingress-port\”: \”1\”,\”ip-src\”:\”10.0.0.1\”, \”sw\”: \”00:00:00:00:00:00:00:02\”,\”queue\”:\”2\”,\”enqueue-port\”:\”1\”}”
]
}
Closed connection successfully

Take a look in the Browser to make sure it was taken

Verify the flows work, using iperf, from h1 –> h2

Iperf shows that the bandwith is limited to ~2Mbps. See below for counter iperf test to verify h2 –> h1

Verify the opposite direction is unchanged. (getting ~30mbps benchmark )

The set-up of the queues on OVS was left out of this example. but the basic setup is as follows:

  • Give 10GB bandwidth to the port (thats what is supports)
  • Add a qos record with 3 queues on it
  • 1st queue, q0 is default, give it a max of 10GB
  • 2nd queue is q1, rate limited it to 20Mbps
  • 3rd queue is q2, rate limited to 2Mbps.

I will be coming out with a video on this soon, as well as a community version of it once it is more fully fleshed out. Ultimately QoS and OpenFlow are at their infancy still, it will mature as the latter specs become adopted by hardware and virtual switches. The improvement and adoption of OFConfig will also play a major role in this realm. But this is used as a simple implementation of how it may work. Integrating OFConfig would be an exciting feature.

R